
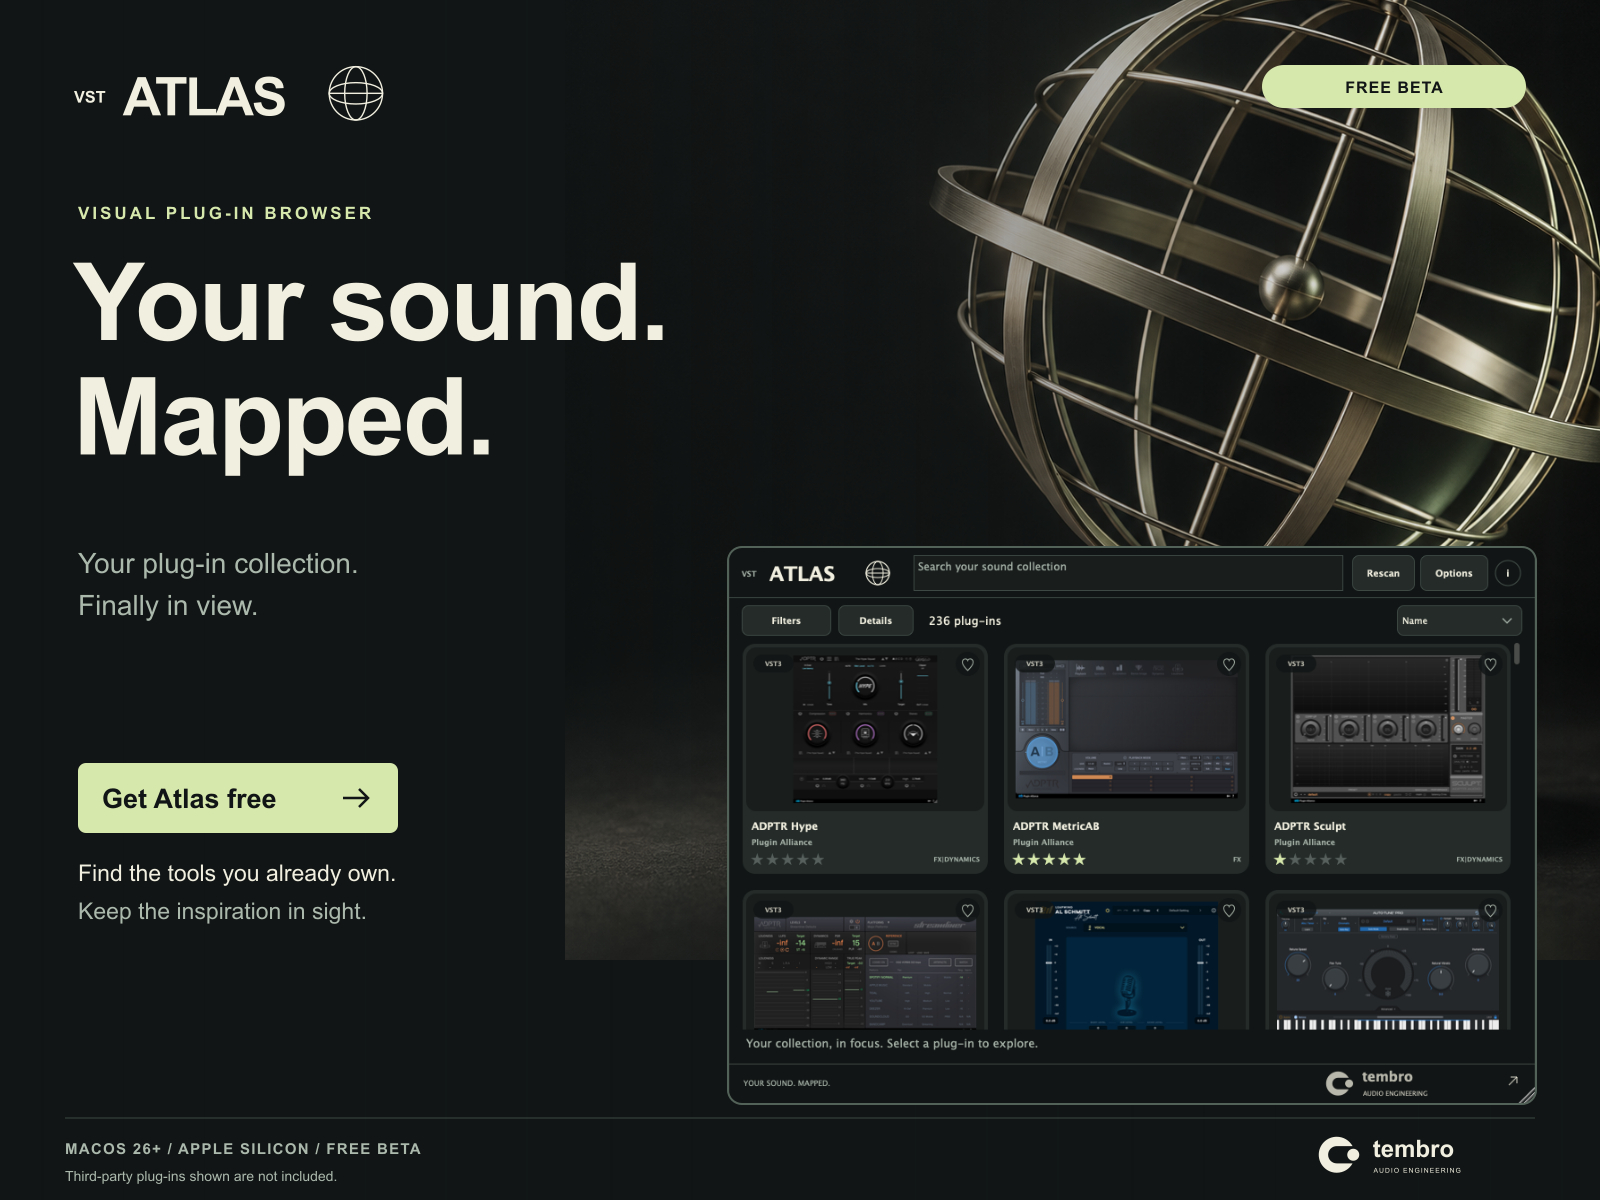
VST Atlas / Free beta
Your sound.
Mapped.
Your plug-in collection. Finally in view. Find the tools you already own, and keep the inspiration in sight.
macOS 14 or later · Apple Silicon and Intel
VST3 · Audio Unit · Standalone · Linux beta (VST3 and Standalone)
Developer ID signed and notarized by Apple. Third-party plug-ins are not included.
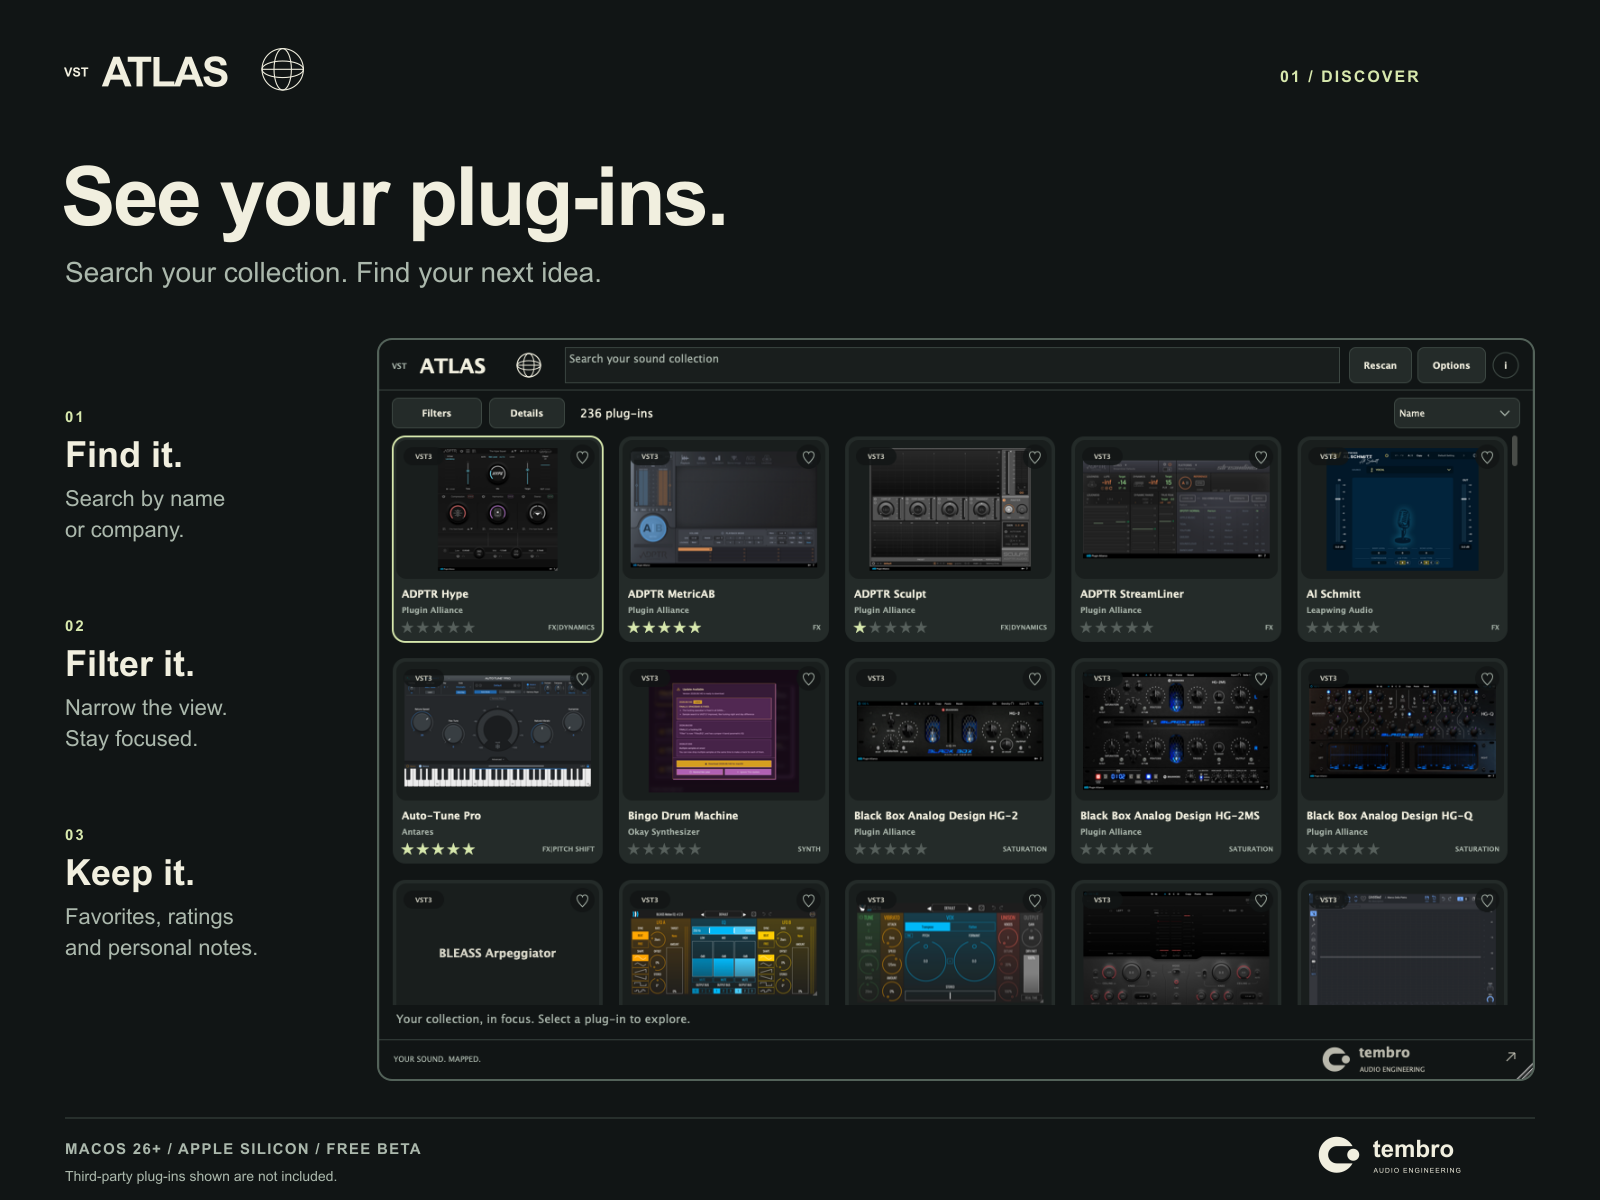
01 / Discover
See your plug-ins.
Browse a visual library. Search by name or company, narrow the view with filters, and rediscover what you own.
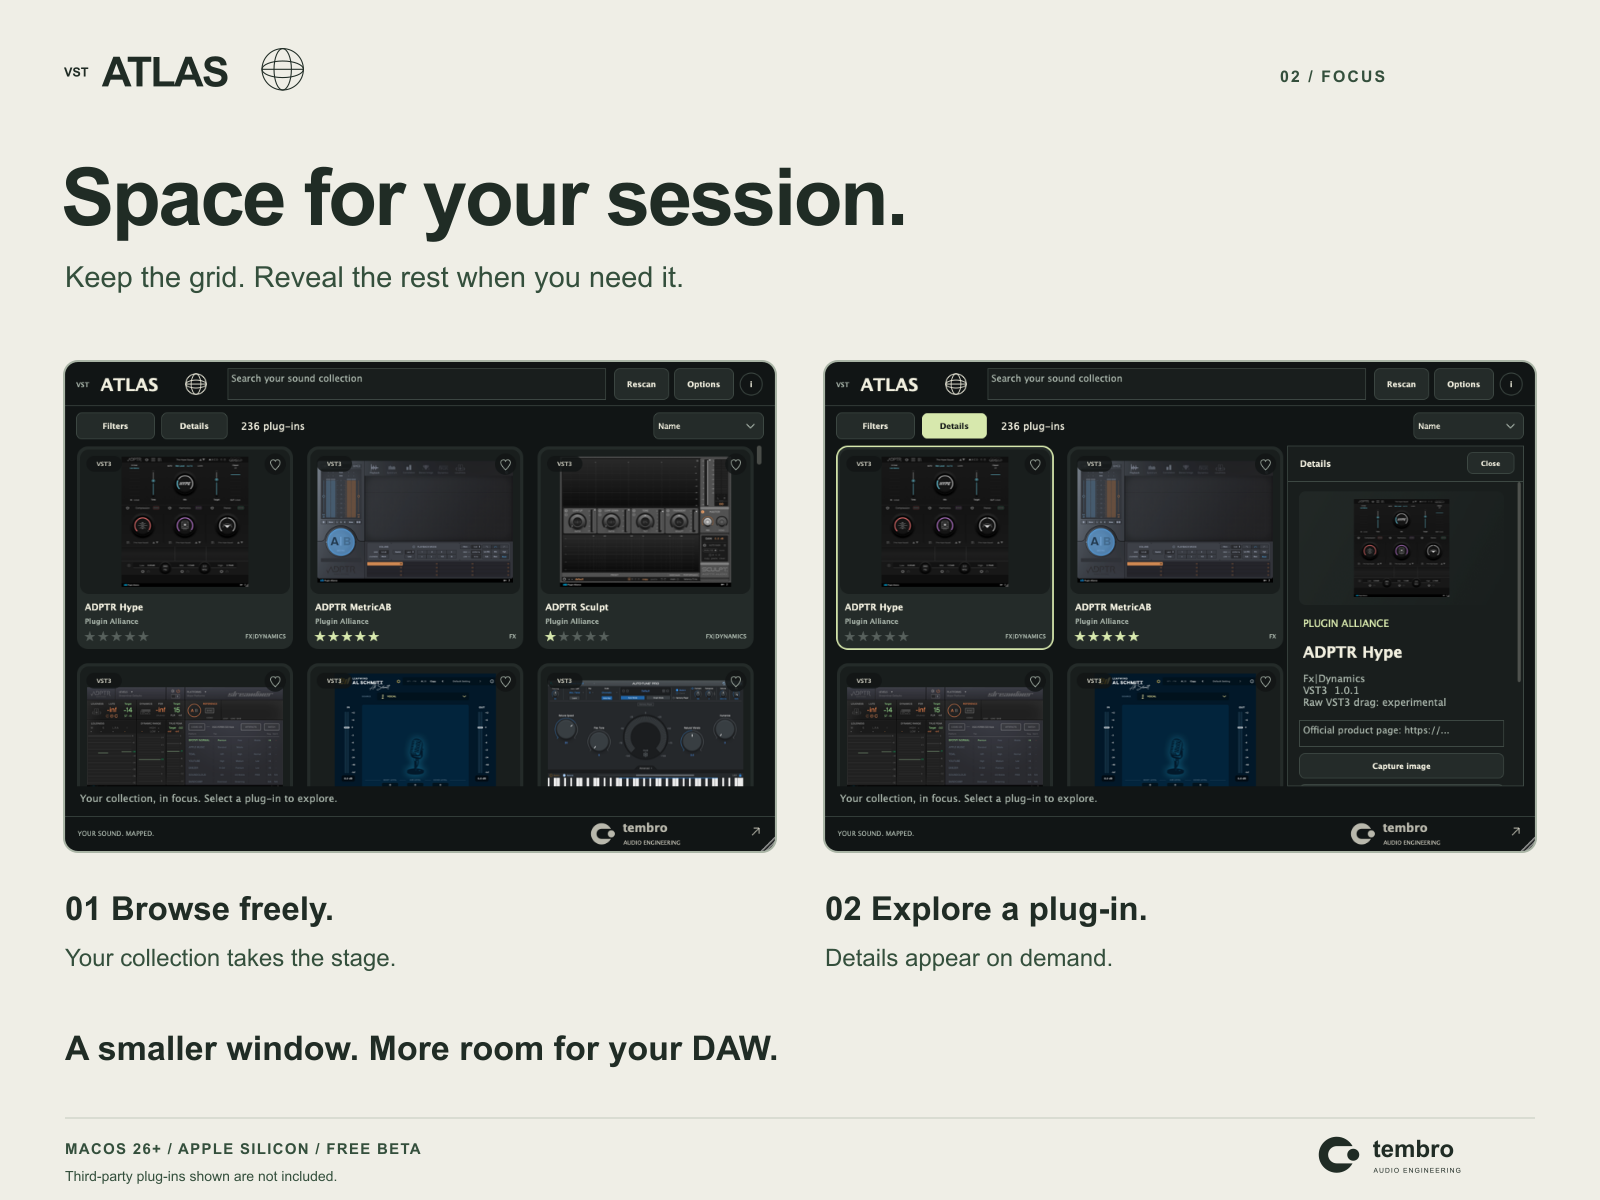
02 / Focus
Space for your session.
Keep the grid in view. Open Filters or Details when you need them, then put the collection back in the spotlight.
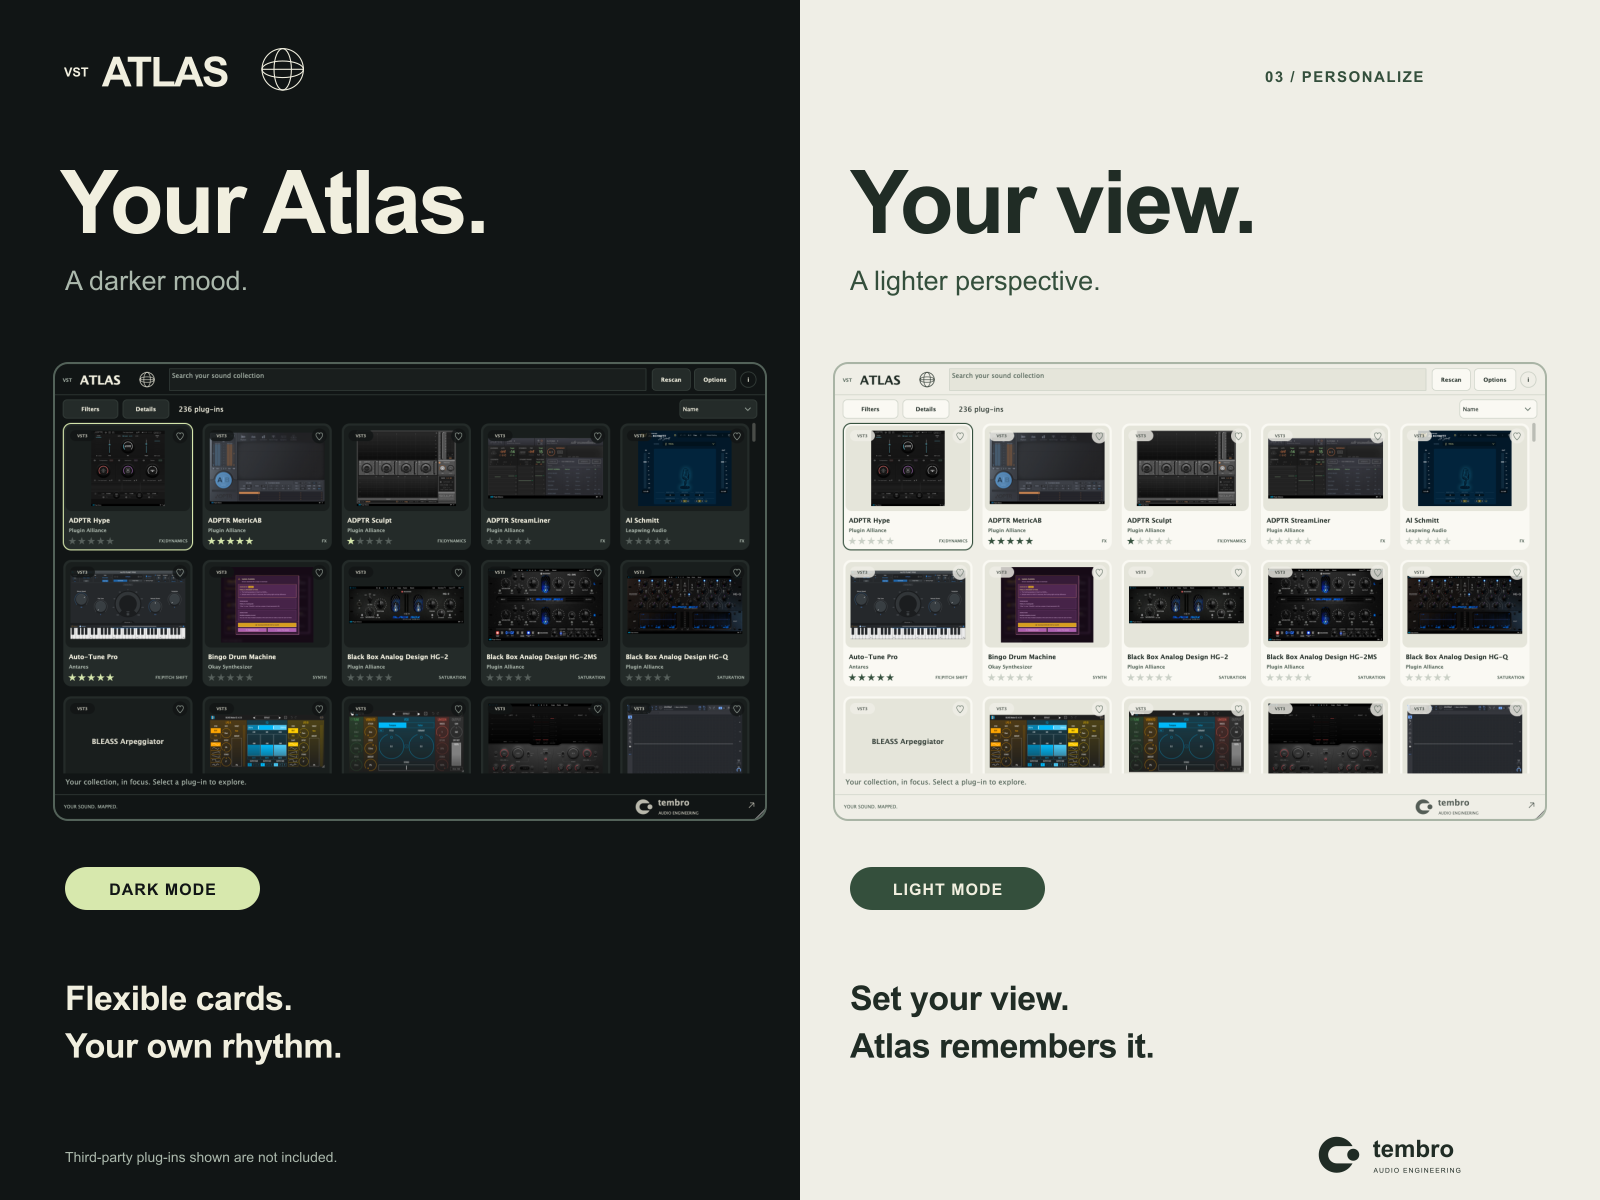
03 / Personalize
Your Atlas. Your view.
Light or dark. Compact or spacious. Adjust the cards and keep favorites, ratings and notes close at hand.
A closer look.
Start here
From download to collection.
- Download the macOS installer package. It contains the Standalone app, VST3, Audio Unit and their scanner for Apple Silicon and Intel Macs.
- Close your DAW, then open the .pkg and follow the installer. It installs to /Applications and the system plug-in folders. Move any earlier Atlas copy in your home folder to a backup first.
- Open VST Atlas from Applications and press Rescan to build your catalog.
- Restart your DAW and rescan its plug-ins. Open Atlas as VST3 or Audio Unit and drag a card into a track.
- Get the plug-in pictures. After the scan, choose Acquire GUI images. The first time, macOS asks for Screen Recording: open System Settings → Privacy & Security → Screen & System Audio Recording, turn on the app macOS names (VST Atlas, its scanner, or your DAW), then quit and reopen it and run Acquire again. Atlas opens each plug-in briefly and saves its picture. You can also use Import image for any card.
- On Linux (Ubuntu 22.04 x86_64), extract the archive and run python3 install.py as your normal user. It installs VST3 and the app for your user only.
About this beta. The macOS installer is Developer ID signed and notarized by Apple, so it opens without Gatekeeper warnings. No developer tools or activation key are required. Optional GUI capture asks for Screen Recording permission the first time you use it.
Before you download.
What is included?
A macOS installer with the Atlas Standalone app, VST3, Audio Unit and VST3 scanner, a Linux archive with VST3 and Standalone, and the installation guide. The third-party plug-ins pictured in the gallery are examples from an existing collection and are not included.
Does it work in every DAW?
Inside Ableton Live, Atlas prepares device defaults automatically: wait until the card is ready, then drag it into a compatible track or chain. From the standalone app, choose Options → Drag to → Ableton Live first. For other hosts, link a preset exported by that DAW. Support varies by host and plug-in; check the linked preset and track type if a card cannot be loaded.
How do I get the plug-in pictures?
After scanning, choose Acquire GUI images. macOS asks once for Screen Recording permission: enable the app it names under System Settings → Privacy & Security → Screen & System Audio Recording, then quit and reopen it and run Acquire again. Atlas opens each plug-in briefly and captures its interface. Some plug-ins that only show a licensing window cannot be captured; use Import image for those.
Do I need a license key?
Atlas is free and does not need an activation key. Complete the free checkout with your email to receive the download. Your own third-party plug-ins may need their existing licenses.